Insight Analysis
Overview
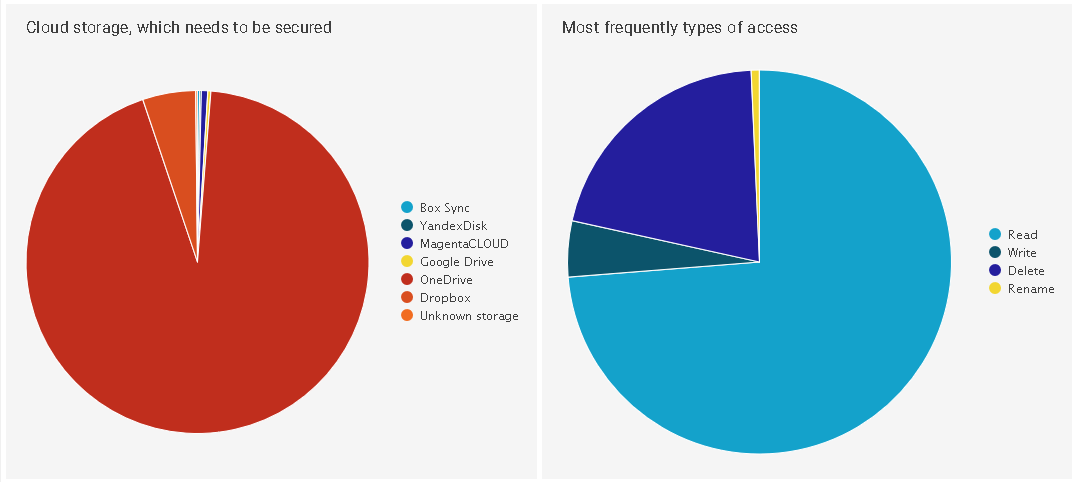
Insight Analysis is activated on a user and on a computer. The product logs events of the Agent and displays results in the form of diagrams and graphs. Allows for viewing the percentage of video files copied by users to flash cards, the number of social network sites visited, applications opened etc.
Setting up Insight Analysis
- Go to Product settings | Insight | Settings.
- Click Edit.
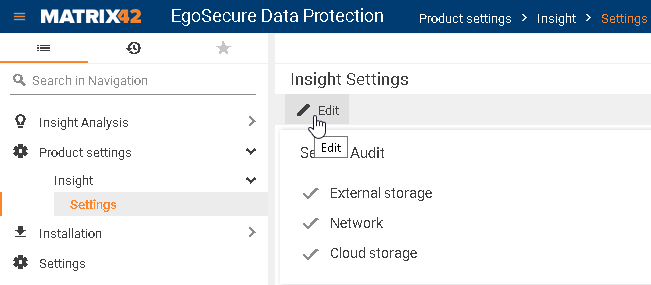
- In the Secure Audit area, select events to be written for Insight.
- In the Secure Audit reports calculations area, define how statistics taken from all reports under Reports | Secure Audit panel must be calculated to align with your company needs:
a. User-based: statistics are taken from a user, for whom the Insight Analysis product is activated. This user can sign in to different computers with one account.
b. Computer-based: statistics are taken from all users of a computer, for which the Insight Analysis product is activated. Several users with several accounts can sign in to one computer and statistics is calculated for the computer on the whole. - Click Save.
Protecting user data displaying with a password
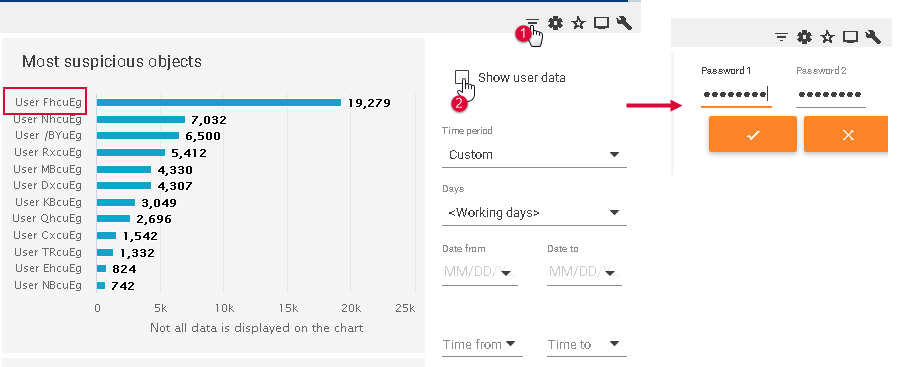
You can protect access to user data in reports with simple/double password protection. In the exported data and in the Console, a random sequence of letters is displayed instead of the user data. User data are only shown in the Console after entering the password(s).
Enabling password protection
- Go to Product settings | Insight | Settings.
- Click Edit.
- Enable the Protect user data with password check box.
- Select whether to protect with one or with two passwords.
- Enter the password and confirm it.
- Click Change.
- Click Save.
Filtering info in charts
- Click
 in the toolbar on the right.
⇒ The Charts filters pane appears on the right.
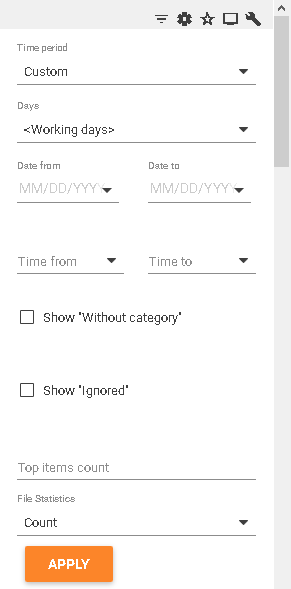
- In the Time period field, select the period of time or select Custom to define the dates and time manually below.
- In the Days field, select which days a filtered in the selected time period.
- In the Top items count field, select how many objects (users, computers, devices, sites, apps, etc.) are shown on one chart.
- In the File statistics field, select whether to display file size or their count.
- To add a filter, click on any part of the diagram.
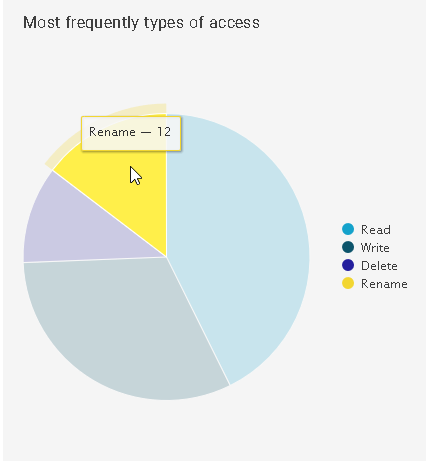
⇒ The filter appears in the lower part of the Charts filters pane and all charts are rebuilt based on this filter.
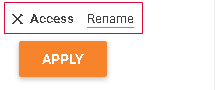
- Click Apply.
Showing and hiding charts
- Click
 in the toolbar on the right.
⇒ The Dashboard customization pane appears on the right. - Click on
 to hide an item.
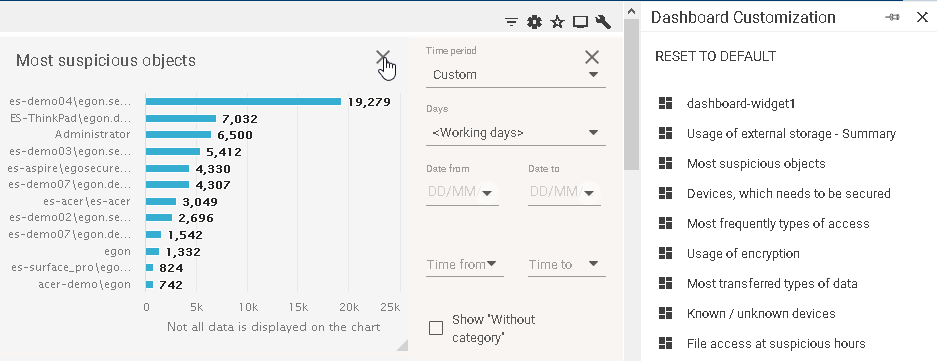
⇒ In the Dashboard Customization pane, appears near the hidden item.
 - Click on plus to show the item back.

- You can also move items and change their size.
- To revert the size, position and order of items to their initial view, click Reset to default.