RabbitMQ Securing with TLS/SSL
About this document
This document describes the steps to enable TLS/SSL security on the RabbitMQ server running on Windows based on the installation performed with the Powershell script provided by Matrix42 on the Marketplace. An adaption to other installations and configuration is possible but not part of this document. Please see the official RabbitMQ documentation for individual configurations.
Introduction
RabbitMQ is a central 3rd party component in the Matrix42 SUEM product which allows a fast and reliable communication of the core products and the Digital Workspace Platform (DWP). The standard installation uses an unencrypted transfer of the messages and authentication to the broker. In order to use encrypted communication the server needs to be configured and all participants (DWP, Empirum, Silverback, EgoSecure Data Protection and eventually others) need to be adjusted to use the secured messaging protocol ampqs instead of ampq. Also the access to the RabbitMQ Management Console is restricted to use https with TLS enabled.
Prerequisites
This guide assumes the following prerequisites are available:
- A valid certificate with private key password for the server on which the RabbitMQ server is running
- A working RabbitMQ server based on the description in the online help
- OpenSSL installed on a Windows Computer (i.E. https://indy.fulgan.com/SSL/openssl-...4_86-win64.zip)
Step by step configuration
Prepare the certificate used on the RabbitMQ server
RabbitMQ requires the certificate and the CA as PEM files.
- Copy the certificate to the computer where OpenSSL is installed (i.E c:\openssl\certs\my-cert.dom.pfx)
- Export the trusting CA certificate as PKCS including all certificates in the certification path
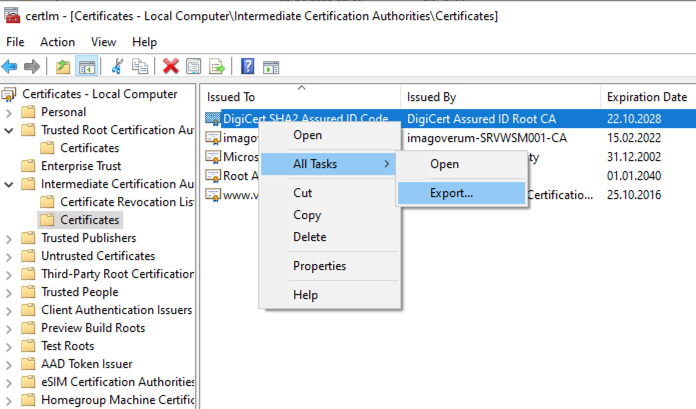

- Copy the exported certificate to the computer where OpenSSL is installed (i.E c:\openssl\certs\ca-cert.P7B)
- Convert the certificates to PEM by opening the OpenSSL shell. Run "openssl" in the folder where it is installed
- pkcs7 -print_certs -inform der -in cert\alpha.p7b -out alpha.pem
- pkcs12 -in cert\wildcard.imagoverum.pfx -nokeys -out public-imagoverum.pem -nodes
- pkcs12 -in cert\wildcard.imagoverum.pfx -nocerts -out private-imagoverum.pem -nodes
- Copy the PEM files to a location on the server which than needs to be secured. The service account which runs the RabbitMQ service needs to have read access to this.
Please make sure the PEM file with the private key are not exposed to anyone. Remove from temporay loction and set NTFS rights to only allow the service account (local system) read access.
Create RabbitMQ configuration file
RabbitMQ uses an optional configuration file "rabbitmq.conf" where the SSL/TLS configuration is defined.
- Create a new text file rabbitmq.conf in the program folder of RabbitMQ (i.e. C:\Program Files\RabbitMQ Server\rabbitmq_server-3.8.0\rabbitmq.conf)
- Add the following configuration and adjust the path according to your certificate file folder:
listeners.ssl.default             = 5671

ssl_options.cacertfile           = c:/cert/alpha.pem

ssl_options.certfile             = c:/cert/public-imagoverum.pem

ssl_options.keyfile              = c:/cert/private-imagoverum.pem

ssl_options.verify               = verify_peer

ssl_options.fail_if_no_peer_cert = false

listeners.tcp = none
management.ssl.port       = 15671

management.ssl.cacertfile = c:/cert/alpha.pem

management.ssl.certfile   = c:/cert/public-imagoverum.pem

management.ssl.keyfile    = c:/cert/private-imagoverum.pem
In this example alpha.pem is the CA certificate which is the certification path for the private-imagoverum.pem and public-imagoverum.pem based certificate.
This option "listeners.tcp = none" prevents the system to be exposed for not secured connections. Only ampqs sessions can be established.
Reinstall the RabbitMQ Service
In order to use the just created rabbitmq.conf file the service needs to be reinstalled. Perform the following steps in the correct order.
- Open a command window on the server where RabbitMQ is installed and change to the program sbin folder (i.e. cd C:\Program Files\RabbitMQ Server\rabbitmq_server-3.8.0\sbin). This folder contains several batch files. Make sure not to accidently use rabbitmq-server.bat instead of rabbitmq-service.bat.
- Run the following commands one after the other:
- rabbitmq-service.bat stop
- rabbitmq-service.bat remove
- rabbitmq-service.bat install
- rabbitmq-service.bat start
- Check the status of the server once all commands are performed without an error: rabbitmqctl.bat status
- After each change of the rabbitmq.conf file the steps above need to be performed again.
The output shows something similar to this at the end:
Interface: [::], port: 25672, protocol: clustering, purpose: inter-node and CLI tool communication
Interface: [::], port: 5671, protocol: amqp/ssl, purpose: AMQP 0-9-1 and AMQP 1.0 over TLS
Interface: 0.0.0.0, port: 5671, protocol: amqp/ssl, purpose: AMQP 0-9-1 and AMQP 1.0 over TLS
Interface: [::], port: 15671, protocol: https, purpose: HTTP API over TLS (HTTPS)
Interface: 0.0.0.0, port: 15671, protocol: https, purpose: HTTP API over TLS (HTTPS)
If the state cannot be retrieved because of authentication issues the used Windows user might not be the same as the installation user of RabbitMQ and Erlang. Therefore the session cookie might not be correct. Copy the file .erlang.cookie from C:\Windows\System32\config\systemprofile to your users profile root (i.e. c:\users\username\)
The server now requires secured ampq. All existing connections will be rejected. For testing purposes the option "listeners.tcp = none" can be removed. This would allow secure and insecure connections.
Configuration of the connected Clients
All RabbitMQ clients need to be reconfigured.
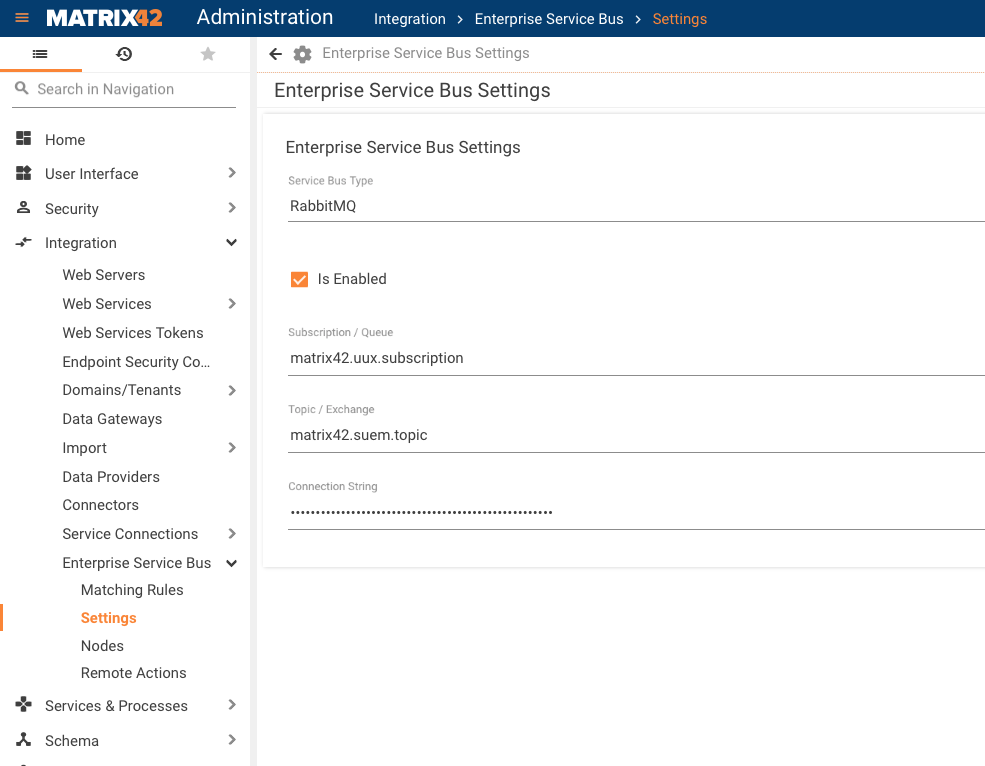
ESB Extension for UUX
- Open the Administration App
- Navigate to Integration -> Enterprise Service Bus -> Settings
- Select the current configuration and Edit
- Provide the connection string as defined before with ampqs instead of ampq (i.e. amqps://USER:PASSWORD@SERVER.COMPANY.COM/mx42)
- Save (the updated setting will be used after the execution of the ESBAdapterActivation engine activation and can take up to 5 minutes)
- The checkbox "Is Connected" in the settings list should be selected after refreshing the page
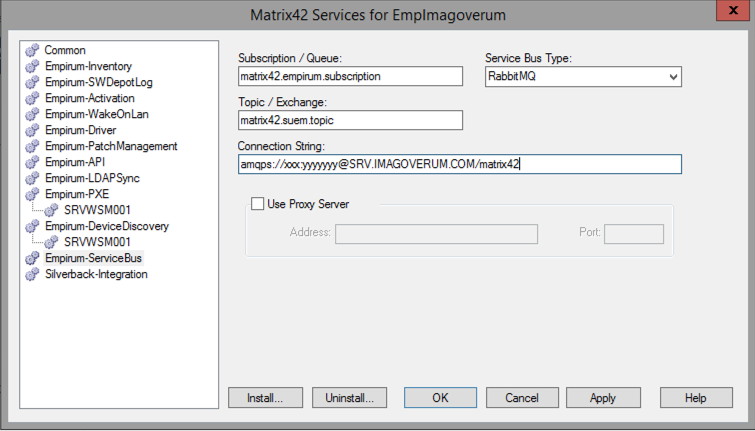
Empirum
- Open DBUtil on the Empirum server
- Select Install/Configure Services from the Actions menu
- Select Empirum-ServiceBus
- Change the connection string to ampqs instead of ampq (i.e. amqps://USER:PASSWORD@SERVER.COMPANY.COM/mx42)
- Click "Apply"
- Right-Click the Empirum-ServiceBus in the list and select Install
- If the certificate is not working the servcie cannot be installed. Please check the Log for details (C:\ProgramData\Matrix42\Logs\Empirum ServiceBus Service)
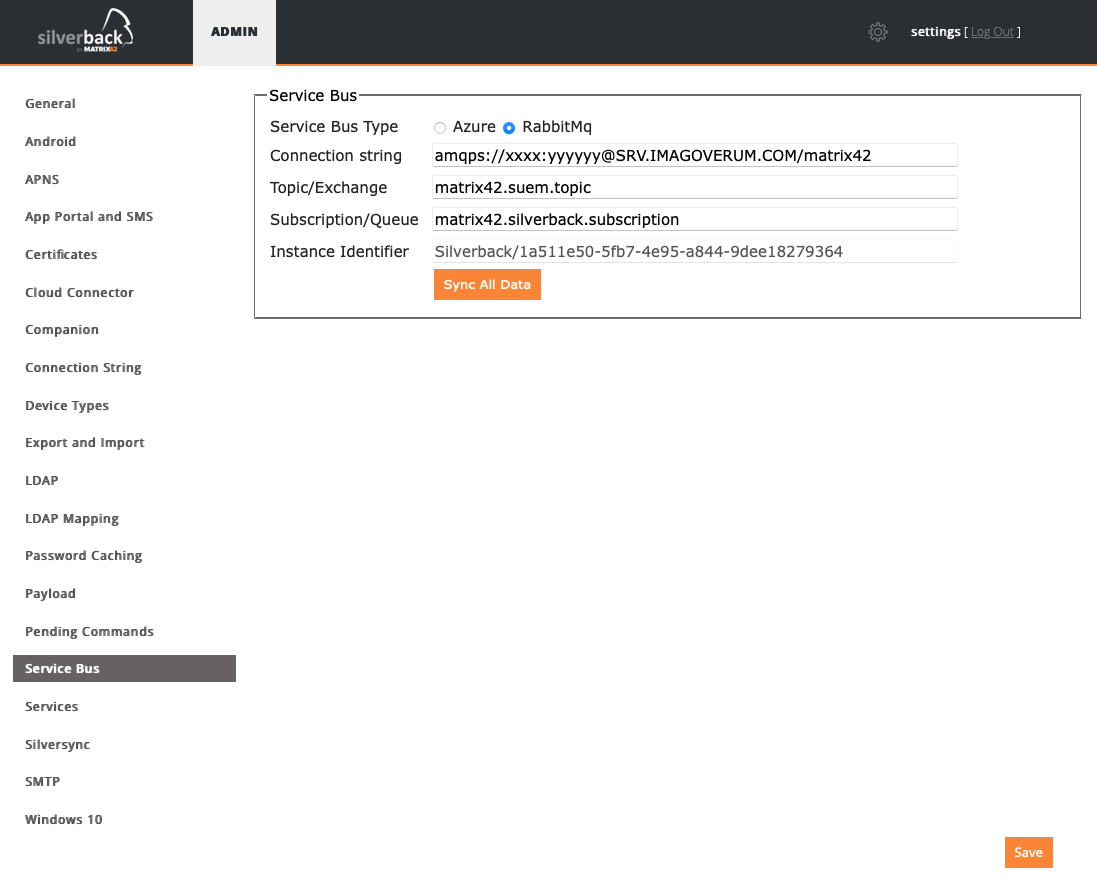
Silverback
- Logon to the Silverback Server with the "Settings" user
- Select "Service Bus"
- Change the connection string to ampqs instead of ampq (i.e. amqps://USER:PASSWORD@SERVER.COMPANY.COM/mx42)
- Click "Save"
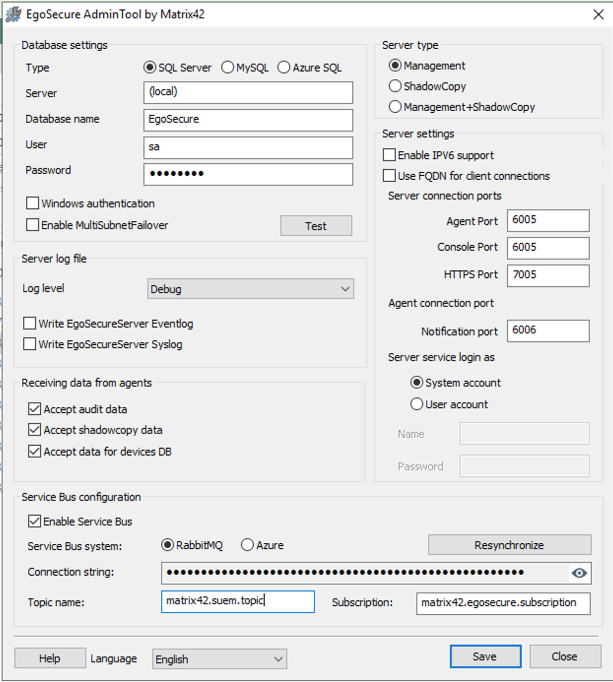
EgoSecure Data Protection
- Open the AdminTool.exe in the EgoSecure program folder (i.e. C:\Program Files\EgoSecure\EgoSecure Server)
- Change the connection string to ampqs instead of ampq (i.e. amqps://USER:PASSWORD@SERVER.COMPANY.COM/mx42)
- Click "Save"
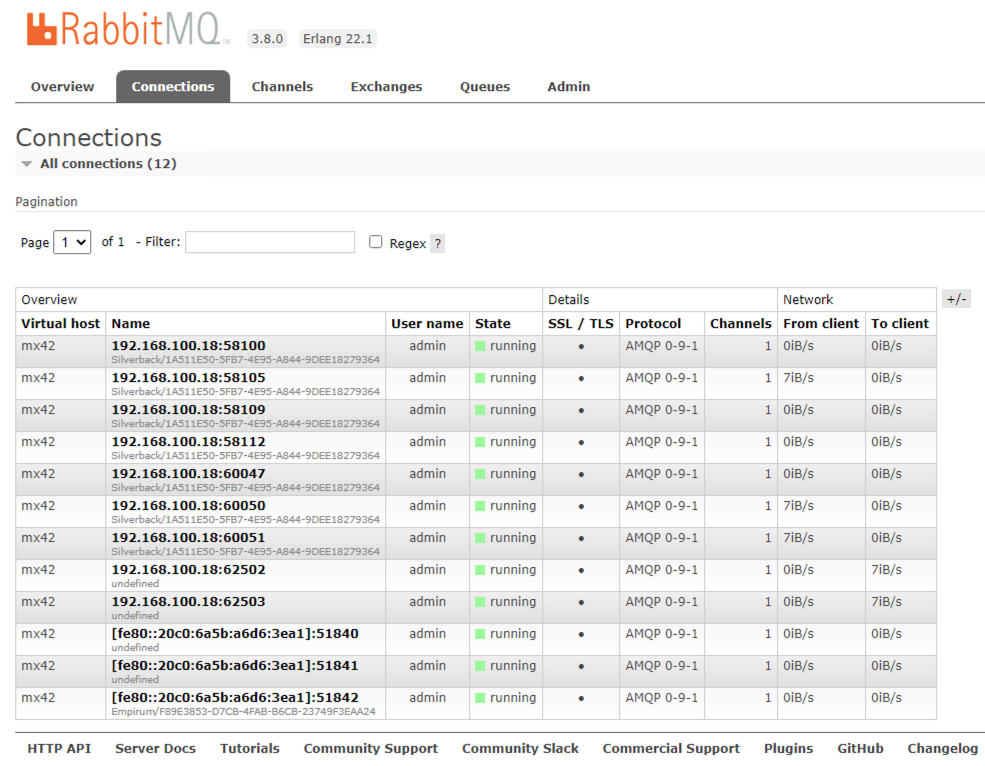
Checking the secured connection
Verify that the console and all clients are able to connect to the server with TLS/SSL:
- Open the RabbitMQ Management console in a browser on the server where RabbitMQ is installed (https://server.dom.com:15671)
- Select "Connections"
- The list shows all current connections
- The column SSL / TLS indicates if the connection is secured. The dot needs to be solid.